There are spaces that I am able to keep clutter free and clean. My office, unfortunately, is not one of them. When I first set it up, it was pretty good – there was a place for everything and everything in it’s place. I make a note to throw something away after X period of time, but that time passes, and the item that was to be tossed is now covered by something newer.
And then, eventually, you the state of your space through the eyes of your family – and it’s not a pretty sight.
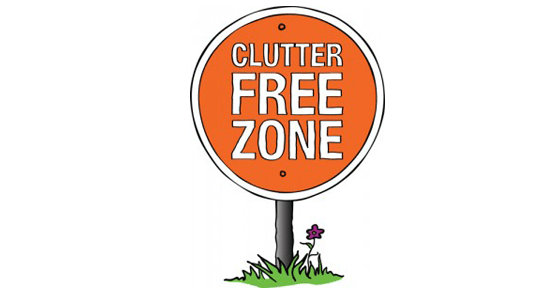
So, I gave claude.ai some context and asked it to come up with one-hour-a-day plan for me. I don’t expect it to be exactly one hour a day or even every day, but as I looked around I realized I didn’t actually know where to start. So it’s time to pitch and purge and feel good about it.
Phase 1 · Days 1–3
The Great Sort
Don’t organize yet — just categorize everything
- Day 1 – Set up 5 physical zones on your floor or a table: Keep & active use · Tech / cables · Papers · Donate / sell · Trash. Then start pulling everything off the desk surface only — nothing else.
- Day 2 – Continue sorting desk contents into zones. Don’t put anything back yet. If you’re unsure about an item, it goes in Keep. The goal is a completely clear desk surface by end of session.
- Day 3 – Sort floor items (that aren’t floor cables) into zones. Bag the Trash zone and take it out. Box the Donate/sell zone and put it by the door.
Desk is clear. You can see the floor. Trash is gone.
Phase 2 · Days 4–6
Papers & filing
One drawer or cabinet dedicated to physical backups
- Day 4 – Assign one drawer (or one cabinet shelf) exclusively to important papers. Create simple categories: Financial · Legal / ID · Medical · Manuals & warranties · Reference. Use labeled folders or a simple accordion file.
- Day 5 – Assign one drawer (or one cabinet shelf) exclusively to important papers. Create simple categories: Financial · Legal / ID · Medical · Manuals & warranties · Reference. Use labeled folders or a simple accordion file.
- Day 6 – Close out the paper pile. Anything that needs action (signing, mailing, reviewing) goes into a single Action needed folder on your desk — not scattered around it.
All papers have a home. One folder for active items, rest is filed.
Phase 3 · Days 7–12
Tech triage
Cables, drives, and gadgets — sorted by frequency of use
- Day 7 – Cables only. Sort into: currently in use · occasionally needed · unknown / untested · dead weight. Coil and label anything you’re keeping with a short strip of masking tape.
- Day 8 – Hard drives. Label each one if not already labeled. Group: active drives in use · archive/backup · unknown contents. Unknown ones go into a “test later” bag — don’t let them block progress.
- Day 9 – Assign a storage home for active tech — a shelf, a drawer, or a labeled bin on a bookshelf. Frequently used items go at arm’s reach. Infrequent access items go in a cabinet or higher shelf.
- Day 10 – Assign a deep storage spot for archive drives and rarely-used gadgets. A single labeled bin or box in a cabinet works well. Out of sight, but you know exactly where it is.
- Day 11 – Deal with the “dead weight” cable pile and any gadgets with no clear purpose. If you haven’t used it in 2 years and can’t name a future use — it leaves. Electronics recycling or donate.
- Day 12 – Clean up the remaining floor area around where the network cables cross. You’re not running cables yet — just clearing the path so the job is unobstructed when you get there.
Tech is sorted. Path for cable re-run is clear. Floor hazard is reduced.
Phase 4 · Days 13–16
Network cable re-run
Now you have the space to do it properly
- Day 13 – Plan the route. Walk the path with the floor clear and decide: baseboard, wall plate, cable raceway, or through the wall. Buy any materials you need (raceways, staples, keystone jacks, patch panels, wall plates).
- Day 14 – Run the cable. With the floor cleared, this should be straightforward. If going through a wall, this session may just be the rough-in work.
- Day 15 – Terminate, test, and clean up the run. Secure any raceways or cable staples along baseboards. Confirm link lights are happy.
- Day 16 – Dress the desk area — route any remaining desk cables (power, USB, monitor) through a cable management tray or velcro ties. The desk surface should look clean and intentional now.
No more floor cables. Tripping hazard eliminated. Network is clean.
Phase 5 · Days 17–20
Final fit-out & maintenance system
Set up a system that stays organized on its own
- Day 17 – Arrange the bookshelves and cabinets with intention. Frequently accessed things at eye level. Archive and rarely-used items go high or low. Everything has a label or a clear visual group.
- Day 18 – Set up your desk as a working surface, not a storage surface. Only what you actively use daily lives on it. Everything else has a drawer or shelf home.
- Day 19 – Walk the room and identify the 3 most likely failure points — the spots things will pile up again. Put a bin, tray, or hook at each one. Give clutter a landing spot that isn’t a flat surface.
- Day 20 – The 10-minute reset. Do a full room reset from scratch — put everything back where it belongs. This teaches you if your system actually works. Anything without a clear home still needs one.
Organized, cabled, and maintainable. Everything has a place.